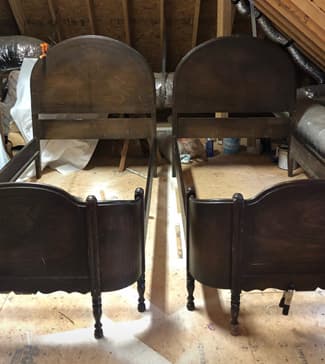
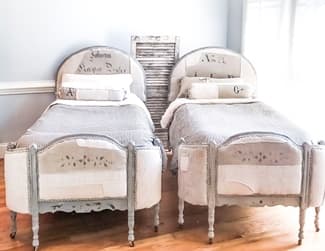
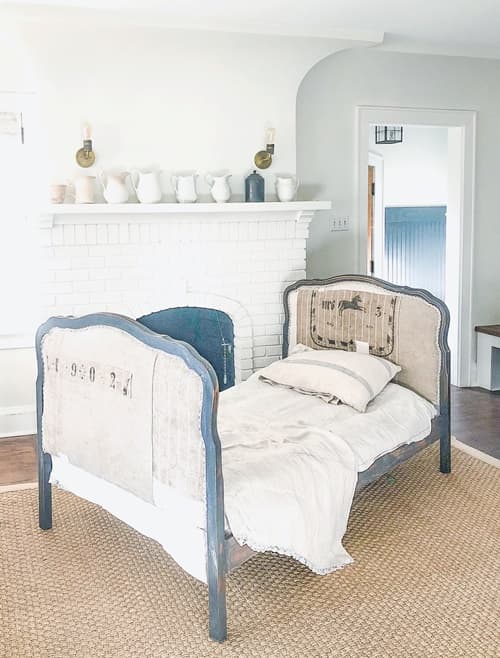
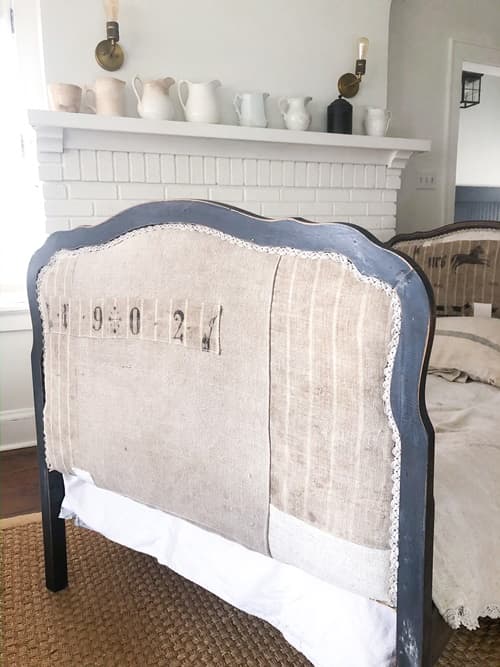
Upholstering the headboard of a solid wood bed is a good beginner DIY project. Probably one of the most important steps to a successful outcome is picking the right piece, one with a flat surface with the exception of the trim framing it. With my experience thrift shopping, this is neither a hard or expensive furniture piece to find. Remember what a difference a little bit of paint can make, add in your favorite fabric, and you can end up with a really special piece that started out looking A LOT less pretty. The following is an example of a set a beds that I redid for the June 2018 City Farmhouse Show in Franklin, TN. I was thrilled that they sold before the show began to one of my favorite vendors for her guest room. They found their way to a very good home.
The Step by Step...
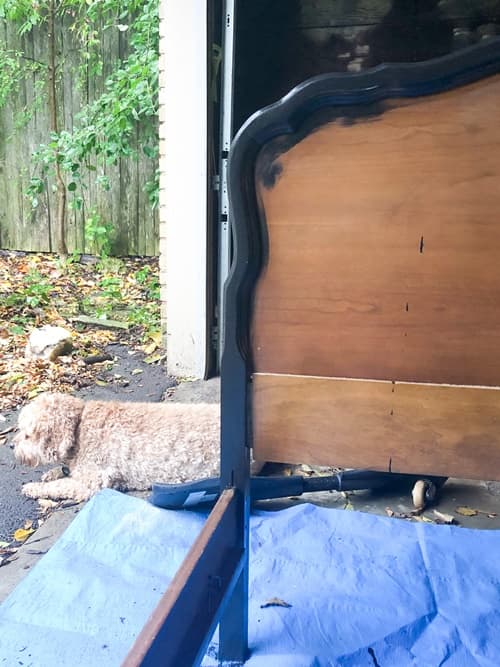
I used this technique more recently on a daybed. Here are plans being made:
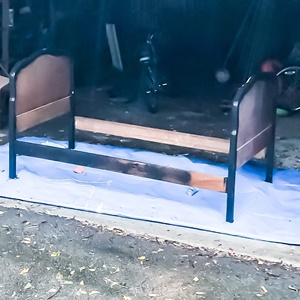
I had wanted to upholster a rustic French style daybed for a couple years, but any potential pieces were always way out of my price range. I found this piece at a local Habitat for Humanity. It was a bargain because I think the bed was originally two headboards that someone put together as a daybed. The backs of the headboards were not very polished. They did have a flat surface and a bit of trim that made it possible to upholster, though, so it was perfect for my needs. I love it when pieces are priced lower because of their faults, and then their faults fit perfectly into my project needs! It feels like fate while trhift shopping. I know you thrifters can relate to the thrill of finding the right piece that seemed to be waiting for your vision at a killer price!
The above picture shows how the bed is put together. Note to self… if you are going to blog about a project pick, a more picturesque place to do the project and take pretty pictures 😊.
Make Everything Stable
The first step in the proces is to make sure everything is stable, and to do any gluing, patching, or reinforcing that needs to be done with the piece before painting. I have often been lured into buying a cheap piece that needs a lot of structural work.This is not my expertise, and never turns out well for me. Some dings or missing trim, however, is almost expected with any second hand piece. Address these issues at the beginning before painting with wood glue or wood filler.
Painting
For the second step, I painted the bed. I chose my go to Miss Mustard Seed Milk Paint, in one of my go to colors, Typewriter. I love this paint because it gives an original old look. I also love that it has a mind of its own. Although you can learn tricks to control how it will dry, I like that it sort of does its own thing with a piece and in the end I believe this is what lends to its authentic look. In this case, there was very little chipping, so I distressed it once dry with fine sandpaper and sealed with Miss Mustard Seed Clear Wax.
Cute original Penny always keeping me company.
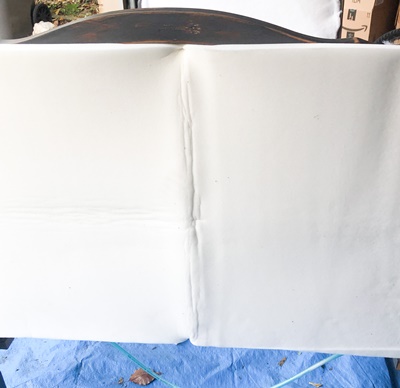
Adding foam
Once the painting was all done, I added foam. In this case, I used 1 inch foam. This added the thickness of padding that I wanted and it was thin enough to use scissors to cut it into the desired shape. I stapled the piece in place and cut it to shape. Another way to do this is to make a pattern using wrapping paper, and outlining it on your foam. I really don’t worry too much about this being perfect because I add dacron (upholstry batting) on top of the foam that covers imperfections.
**Note about the staple gun** This is the link to the one that I use attached to my compressor, Surebonder staple gun. I have really liked it and I can control it really well. But if you are just starting out and can’t invest in a compressor, this is another option, manual staple gun. It will get the job done. Its drawbacks are the staple placement is a bit more difficult and your hand will get a serious work out. But it works! If investing money into a compressor is holding you back from trying an upholstery project, I say give it try with the cheaper staple gun. PS – If you do use the Surebonder, make sure you oil after every use. I was lazy about this and it jammed, damaging it really quickly.
**Another note** I like to have at least two sizes of staples on hand. In the beginning of the project I use the smaller ones so they are easy to remove when I am still working on the piece. Then when I am ready to commit, I use the bigger staples. Also, staple size is an individualized thing according to the thickness of the wood, and fabric. This is another reason why it is nice to have options.
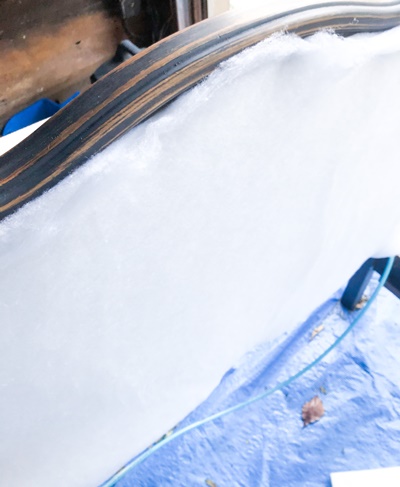
Dacron
The fourth step is adding dacron. This upholstery grade batting is a game changer. It adds padding and a stuffed look. I love this, and I love that it covers up imperfections. I use my smaller staples to secure the dacron and then trim it down as close to possible to the edge. This is where these scissors come in handy.
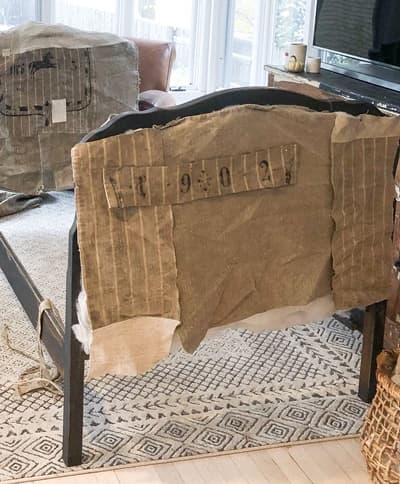
Stapling
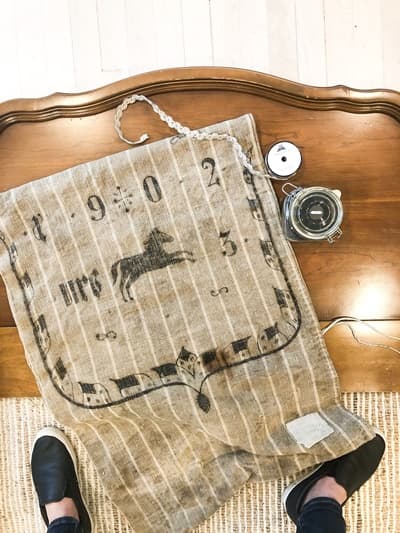
The next step is stapling the fabric in place. The fabric is up to you. I am most definitely partial to antique linens and grain sack, so naturally that is what I used. Again, start with the smaller staples. I like to space a couple of these out to hold the fabric in place loosely, and then fill in with staples between. I almost always have to remove a couple staples to get the right placement. When it looks good I fill in with bigger staples. Try to keep the staples in line with each other as close as possible to make it easier to cover them all with the trim. This is the fun part. It is when the piece starts to look like a real piece of furniture.
Trim the fabric
Sixth, when everything is stapled in place trim, the fabric down as tight as possible to the staples.
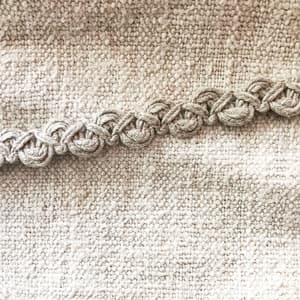
Add Trim
Seventh and last, add trim to cover the staples. This is one of my favorite trims because it has a really natural look and I also think the color tone works nicely with the hemp linen I like to use. To secure the trim in place, use a glue gun. I do like a $20 glue gun versus a $3 one. It feels easier to control the glue and I think it holds better, but work with what you have.